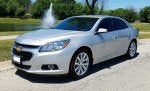

Vehicle: 2018 Optima S
Difficulty: Easy
Time: ~1 hour
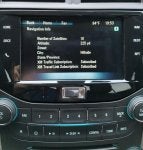
One of the things I wanted with my new Optima was a mirror with Homelink. We have a gate opener and a garage opener, so it'd be nice to have both remotes integrated into the mirror. Plus the auto-dimming is a nice feature where I live - it's very rural and often other driver's forget to turn their high beams off.
I bought a kit from here for $200:
https://www.ebay.com/itm/323089173516
You need P/N D5062-ADU00 since it comes with the harness.
In all honesty though, you could buy a used mirror off eBay and make your own harness. I've seen some folks tapping into the power for the dome light or sunroof. This would probably work, but I figured an extra half hour of work to do it correctly was worth it. Especially if you ever have issues with your sunroof, you don't need to worry about warranty hassles.
Here's the installation instructions from Kia:
https://drive.google.com/file/d/1crYnhJAYIZfDtgNw5TKi1gDMqh4e89GP/view?usp=sharing
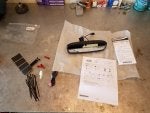
Kit contents:
![]()
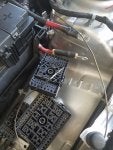
Recommend disconnecting the battery first.
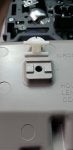
Pull back the weatherstripping and remove the A-pillar. You need to pull it out about an inch and use a pair of cutters to cut the breakaway tab. This needs to be replaced.
![]()
The old and new tab. Apparently it's needed for the side airbag to deploy properly.
![]()
Remove the 2 screws under the sunglass holder.
![]()
Remove the screw for the sunvisor. This part doesn't need to be removed however.
![]()
From the fuse panel, push out the side panel.
![]()
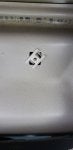
Remove this screw under the cover:
![]()
Remove the lower dash panel.
![]()
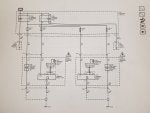
Clip locations on backside of dash panel.
![]()
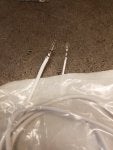
Connector wrapped in foam tape. Stuff behind the headliner.
![]()
Difficulty: Easy
Time: ~1 hour
One of the things I wanted with my new Optima was a mirror with Homelink. We have a gate opener and a garage opener, so it'd be nice to have both remotes integrated into the mirror. Plus the auto-dimming is a nice feature where I live - it's very rural and often other driver's forget to turn their high beams off.
I bought a kit from here for $200:
https://www.ebay.com/itm/323089173516
You need P/N D5062-ADU00 since it comes with the harness.
In all honesty though, you could buy a used mirror off eBay and make your own harness. I've seen some folks tapping into the power for the dome light or sunroof. This would probably work, but I figured an extra half hour of work to do it correctly was worth it. Especially if you ever have issues with your sunroof, you don't need to worry about warranty hassles.
Here's the installation instructions from Kia:
https://drive.google.com/file/d/1crYnhJAYIZfDtgNw5TKi1gDMqh4e89GP/view?usp=sharing
Kit contents:
Recommend disconnecting the battery first.
Pull back the weatherstripping and remove the A-pillar. You need to pull it out about an inch and use a pair of cutters to cut the breakaway tab. This needs to be replaced.

The old and new tab. Apparently it's needed for the side airbag to deploy properly.

Remove the 2 screws under the sunglass holder.

Remove the screw for the sunvisor. This part doesn't need to be removed however.

From the fuse panel, push out the side panel.

Remove this screw under the cover:
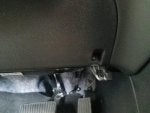
Remove the lower dash panel.

Clip locations on backside of dash panel.

Connector wrapped in foam tape. Stuff behind the headliner.


 .....................................